It is a visual interface for managing the time allocations data. The Web UI represents the availability and utilisation of each equipment for a date/shift. It also allows viewing and editing the time allocations data on an equipment basis or it can be done for bulk equipment states with capability of viewing each activity under its state.
1. Select the site Map Icon on the MiiNT toolbar.
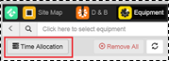
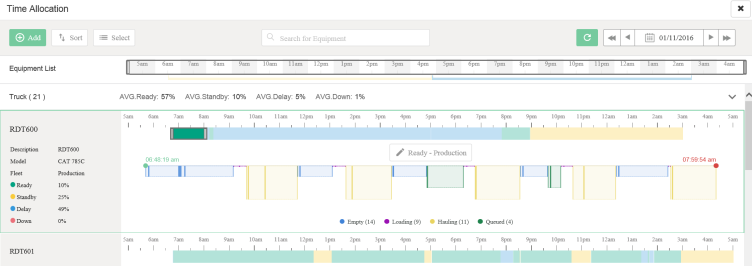
2. On the site map page, select Equipment, then click on time allocation which allows you to view and select equipment.
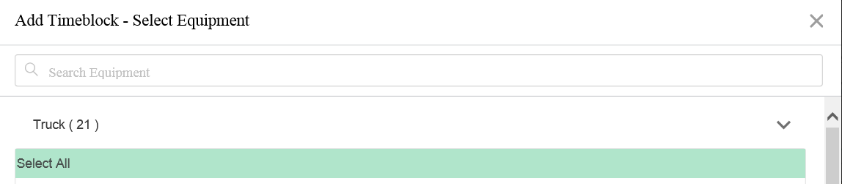
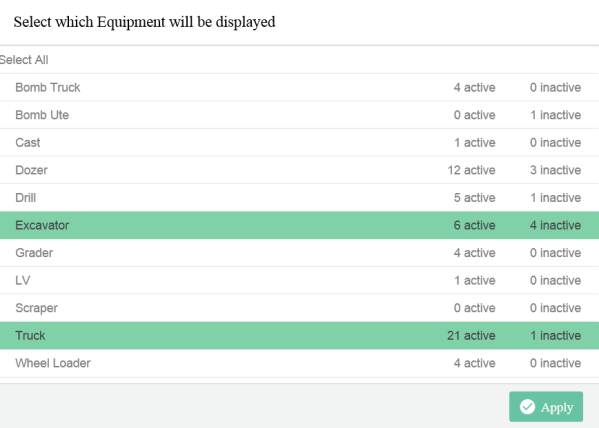
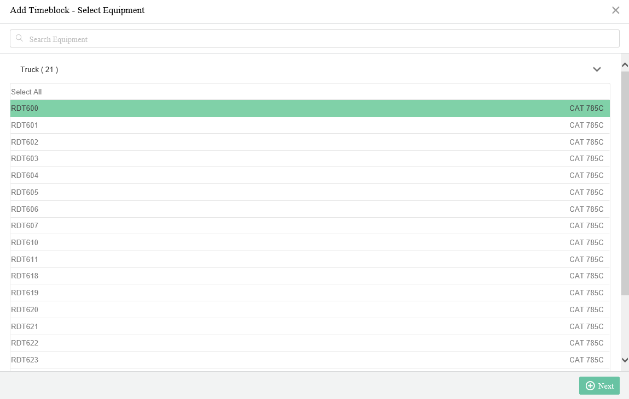
3. Select the equipment type to view, multiple equipment type can be selected (i.e. Truck, Excavator, Drill). All selected equipment will be highlighted in green, to cancel any equipment simply un-select the equipment then press Apply.
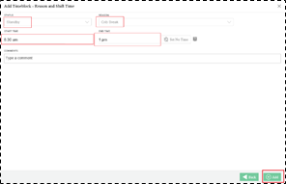
4. The calendar is available to view an Equipment status other than current date/shift. The equipment states/activity can be modified for previous or future dates. Date can be selected and modified by pressing the calendar icon and browsing through the dates.
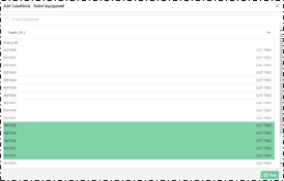
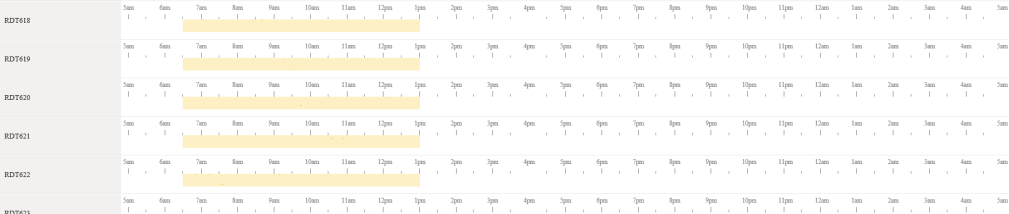
5. To view the equipment lists, click on your selected equipment type and it lists all the active equipment. You can also use the search box to look for an equipment by entering any part of the equipment name to narrow down the list.
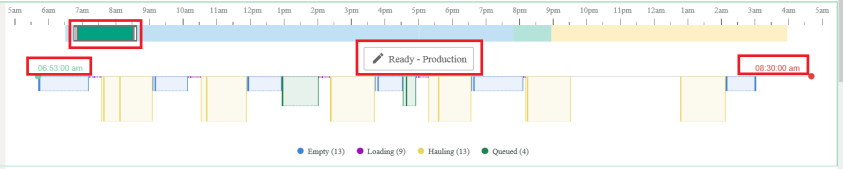
6. The list of the equipment are displayed with their overall productivity during the shift. The KPI’s are calculated using the total time available in each shift not calendar time. AS an example if there are 2 shifts per day for total of 20 hours then the Time Allocations will calculate the hours based on a 20 hour shift day not the 24 hour a day.
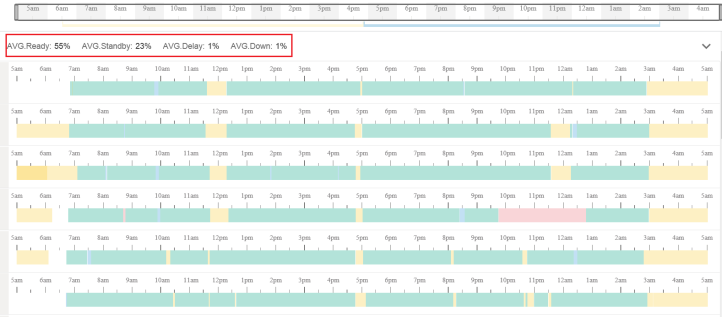
To Add a new equipment type to the existing lists, click on select, choose additional equipment and then press Apply. The Sort option is also available to sort any equipment based on their code, model to do in ascending or descending order.
.
To sort an equipment, select sort option which can be for both Code and Model in Ascending or Descending order, then press Apply.
Select an equipment to view its states then click on each state to view its activities. The productivity percentage for each equipment is shown on the left side.
1. To Add a new Equipment state, select a date and Press Add button from the menu.
.
2 Choose an equipment then press next, enter the states and reason then press Add.
.
3.Ensure the correct start time and end time is selected by selecting the time from clock by pressing the hour/minute part.
To edit the time, select the states that need to be edited, drag the time across the timeline and the new time will be saved. If you need to change the time to more accurate time, it can be modified through Timeblock window.
If the time needs to be changed to more accurate time press the states then you will be prompted with time window to edit. You can now change the starttime/end time, then press update.
Select the states that you need to change, click on the information of the states and you will be prompted with Edit Timeblock window. Select the time from clock by pressing the hour/minute part to choose and press update.
You need to select the time that is valid and between the active shift period.
Select the states that you need to change, click on the information of the states (Ready- Production) and you will be prompted with Edit Timeblock window. Select the time from clock by pressing the hour/minute part to choose and press update.
You will be prompted a message to ensure there is no conflict in activity, you can choose to re-assign, or delete or skip this change. If you Choose skip no changes are applied.
Adding more time to ready production states, it does not add activity hence if Activity can be added in time allocation Data management grid.
1. Select a date then press Add button from the menu.
.
2. Select All, or select the required equipment then press next and enter the states and reason.
3. The states for selected equipment have now been created.
The period shift determines the timeline displayed on time allocations. The time on the screen can be changed by moving the box around the timeline. Hold the mouse and drag right/left to reduce or increase the time. The changes in timeline will reflect on the overall productivity of the equipment.
To add an activity to the time allocation, this is only allowed in MiiNT data management grid and not the Wb UI. Select Shift, date and Equipment and add a new activity or edit an existing activity. To add a new row, press Add New icon and enter the activity information. To Edit a record, ensure the save button is pressed. The changes can now be reviewed on the Web UI.